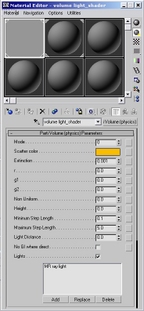
Go ahead and rename the material "volume light_shader." Now like I said before, were not going to go over every setting. Just the ones that were going to use to achieve the effect. Alright, change the scatter color to whatever you want really but I'm going to use a yellowish orange color. This will determine the color of the light rays themselves. Next is Extinction. By default (0.001) that means that pretty much the whole effect will be visible. A value of say 0.5 will be completely invisible. But of course if you render it now you won't see anything since not all the shaders are set up. But what we need to do now is tell the shader to use our spotlight as the source. So scroll down and check the "Lights" option. Then click add and choose the spotlight in the scene. Since that's done, now we need to add the transmat shader. Go to a new material slot and rename it transmat_shader. Go down to the mental ray connection rollout. Unlock Surface and Photon. Click on the none button for surface and add a transmat (physics) shader. You'll see right off that there are no settings for this since it's just a matte material. Click the go to parent button and add the same shader to Photon but this time it will be called Transmat Photon since were putting it in the Photon slot. Select all three planes and apply the shader to them. Hit render and you should get a similar result as below. As you can see there are some volumetric rays casting from the text. Ohh and one thing to point out is depending on the machine you have, rendering times might be a while. It's a very CPU intensive effect. Ohh and one thing to point out is depending on the machine you have, rendering times might be a while. It's a very CPU intensive effect. Just for fun, experiment around with the parti volume shader and the light and see what other looks you can come up with. As for this scene there are some things we could change to make it more dramtic. 
As you can see on the left it looks quite a bit better than the first one. Basically what I did was just increase the multiplier to around 8, made the falloff/hotspot larger and zoomed in on the camera. Also now you can see the rays are easier to see than before. So in reality, it's really not that hard to setup. And you can use this in many different scenarios such as logo's, light coming through a window, underwater light rays, etc. Anyway, thats the end of this tutorial, hope you liked it! Heres another example I did using this same method.  |


