Lights, Camera, Action!
Ok, so we got all the initial geometry ready. Now were ready to create and position the light. First, we're going to want to use a spotlight for this effect because we want the light pointing directly at it so it gives the nice light ray effect were after; As well is make sure that the spotlight is inside the plane box. If the light is outside the planes, the transmat shader won't do us any good and won't see the result correctly. Aight, so starting off in the top viewport, drag out a mr AreaSpot. Rename the light "MR ray light." Increase it's multiplier to 4.0, turn on shadows and make them ray traced. Finally turn on 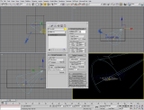 Inverse decay and leave the color white. The reason why we want inverse decay on is it gives a nice falloff to the light. If we had decay off it would be an overkill and would over saturate the effect.
Preparing the shaders
If you render the scene, not much is going on. Now were going to use these shaders that I mentioned about earlier to give it a much more appealing look to it. There's two crucial shaders we'll be using. First one is the parti volume shader and the second is the transmat shader which I already talked about. Parti volume in more technical terms, it's a camera volume shader meaning it uses the camera for the effect plus it's volumetric. So in poor mans terms it's the shader that will control the light rays basically.
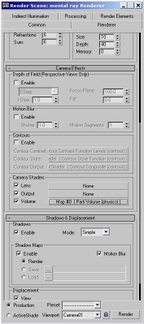
Hit F10 which will bring up the render scene dialog. Go to the rendering tab and scroll down until you see the camera effects rollout. From there you'll see a section called camera shaders and then options for "Lens, Output, and Volume." Now if you click on the none button for Volume you'll see the material map browser window come up. Theres a list of shaders but the one were interested in is the parti volume. So when you add that you'll see it added to the Volume box.
 Alright, once that's done what we need to do is instance it to the material editor so we can do further editing on the shader. So click and drag the shader over to an empty material slot. From here you'll see many options for this shader. But were only going to adjust a few for now.


