Buildings were modeled with a lower level of detail, we tried to put most of the features in the textures (door and window details, etc.). Some procedural noise modifiers were used to add some random irregularities, and we've once again used a lot of beveled edges. 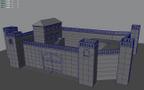
The French fortress of Fort Lallemand
Other models included airplanes (modified ingame meshes for the Stuka bombers), various props and such, which were also modeled using polygons. We created manual UV mapping for each of the models, and usually tried to layout them to as few texture pages as possible. If you have to create a lot of small maps for different parts of an object, like turret, hull, small wheels etc. then you have to spend a lot of time just to manage the individual textures and shaders. Scenes will be cluttered with many little shaders, and it takes more time to modify or update them, as we had to do when creating destroyed versions of some tanks. Because most tanks used only one shader for all parts except the chain links, it only took a few steps to add some layers of procedural fractals to create the destroyed Panzers. 
UV layout of the Tiger tank
UV mapping models with so many little parts takes a lot of time. Automatic unwrapping does not use the texture space effectively enough, and it's usually so cluttered that it's impossible to paint detailed textures; and it also tends to break up the models at the wrong places. We've had no easy solution to this at that time, so I had to manually create planar UV's for small selections of faces, and stitched together the proper parts in the UV editor. The 'move and stitch' tool can be very useful here.
You can, however, skip the planar mapping steps if you start by applying an individual planar UV projection to every polygon in the model. This might sound overkill, but it will guarantee that you'll have no stretching, and each face will have the same texture scale. You can then stitch everything together in the UV editor only.
|


