|
|
 |
|
Torso From Profile Splines Added on: Sun Sep 03 2000 |
| Page: 1 2 |
There are a few ways to model a basic torso. One such way is using the loft command with 4 or more splines. This tutorial will provide a quick look at a way to make a basic torso using loft, and how to split to make collars as well as texturing.
The splines that we will use are going to be interpolated splines (Interpcrv). We will use interpolated curves because they are completely smooth and flowing. There are other curves that you couuld use, but they will have jagged edges.
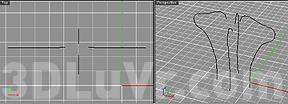
Figure 1
Interpolated Splines draw for the torso.
You must loft now (command = loft) the interpolated splines in order. The order being counterclockwise, or clockwise. Whichever you may fancy, just make sure you select them in order or the produced surface will be all jumbled.
Look at Figure 2 and you should see the dialog box in which I used to model this surface.

Figure 2
Loft Dialog and Quick Shade
Now you would insert isoparms so that there is a adequate amount of points to edit in
the right places. Only add vertical isoparms in this model, because there is a good amount of U Isoparms. Type U or V to change the direction of the isoparms when prompted.
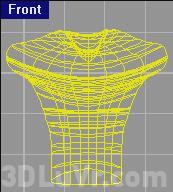
Figure 3
Aftermath of adding Isoparms
|
 |
|
|


