|
|
 |
|
"I, Robot" Added on: Fri Nov 17 2000 |
| Page: 1 2 3 4 5 6 7 8 |
Rendering
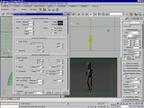
Some of you might be interested to know how I rendered this in Maya. Well, sorry to say, but I did it in Max with Mentalray. Nothing beats a real global illumination renderer, and us Maya users will have to wait some time before we can do it in Maya. :(
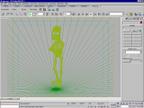
Well, anyway export the model as an OBJ file and import it into Max with the obj2max plugin. You'll have to scale the model up considerably in order to see it. Start by creating a big dome and a plane to match it. The dome has to be pretty huge, it will function as a reflector.
Re-create new shaders for the model, create a slightly grayish matt blinn shader for the ground plane and a bluegray matte blinn shader for the dome. If the dome color is too bright it will reflect to much light , if it's too dark too little. The right color is very important here, mine was r:95 g:118 b:135.
Set the production renderer to Mental Ray and the properties for all objects to "generate Global Illumination".
Create an omni light, place it relatively close to the model, set the multiplier to 0.4. and let it cast shadows (I used raytraced shadows but I wouldn't do that if I where you...).
Now open the "render scene" window check whether the production renderer is activated and scroll down the mental ray properties. Now activate "Global" and "Final Gather". Set the Final Gather sample value to 2000, assign a max.
radius value of 0.05 and a min. radius value of 0.01. There that should do it.
(editor's note: setting a 2000 samples could be an overkill for most renders, you should use lower sample value to reduce the long rendering times without much loss in quality)
Verify for the last time all the settings, especially the viewport camera in the render scene window and press Render.
With these settings it took an 450 mhz Intergraph TDZ2000 with 256mb ram 26 hours.... Ehhh yes that's right 26 hours for a single frame of 1024x768.
Word of advice, don't use raytraced shadows for an omni light when you're doing a global illumination render, BIG MISTAKE!!!! But after over 1 day of rendering this is the result.
After that it is time to add some type and give it a proper theme (after all, you had plenty of time to think it over) I decided that it should be a customer service desk droid, always friendly and patient. I thought it would be a nice idea to turn it into an ad.
The final image is shown below as a wireframe and full rendered.
|
 |
|
|


