|
|
 |
|
"I, Robot" Added on: Fri Nov 17 2000 |
| Page: 1 2 3 4 5 6 7 8 |
Use the parts to make an initial composition or layout of the hand and leave it as it is for now.
Once we skin this geometry to the bones we will see the errors in the layout (bad alignments for instance), be prepared to detach the skin several times to tweak the layout and shapes before you get it right.
Now duplicate and mirror the arm and leg. Group them before you do that, this will create a new node with it's origin at 0,0,0. After duplicating, all you need to do is to change the "scale x" value from 1 to -1 and there you have your mirrored copy at the right place.
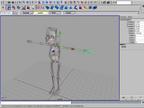
Bones
Make sure that the model is in a "arms stretched" position and everything is aligned nicely. Start making the bones with the joint tool, and since this is a robot you don't need many joints. Start with the pelvis joint, this will be the root joint, and work your way up. You need one joint near the center of the hips (the ribcage will rotate around this point and the two shapes should not intersect each other when you start posing
the model).
The next one will be at shoulder height (from there we will create the arm joints) then one at the bottom of the neck and one at the base of the head, the last joint should be placed in such a way that the corresponding bone indicates the model's direction of view.
Now make the arm and leg bones, attach the left (or right) hip joint to the root joint by shift-clicking on the root joint with the joint tool active. Work your way down the leg, one for the knee one fo the heel and one for the toes.
Mirror these joints by selecting the left (or right) hip joint and select "mirror joint" from the skeleton menu.
Same goes for the arm. Shift-click with the joint tool on the shoulder joint and from there create the left shoulder the left elbow and left wrist joints. The last joint should be placed inside the hand before the knuckles.
From that joint you should create 3 branches for the fingers. Also create a branch from the wrist for the thumb.
As you can see in the picture I made my hand more complex than necessary because I wanted a more organic behavior in the hand, in the end I skipped this. Once the arm and hand are finished mirror it by selecting the left shoulder joint and "mirror joints".
|
 |
|
|


