|
|
 |
|
"Masks" Added on: Sat Sep 25 1999 |
| Page: 1 2 |
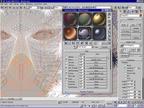
I wanted the feathers to look realistic, but even more I wanted them to pick up the light from the sides, so I went with a raytraced material with mapped translucence. I had to mess around with the settings and the textures to get the right effect. As for the mask, the indentations on the surface were mapped on, and the edges accentuated with opacity mapping.
Then it was time to add the most important part, at least the part I was really thinking of that first moment I heard the topic. After the main lights on the side, I moved them around until there was a high contrast in the person's iris's, with another light solely for the purpose of putting a waterspot on the eyes.
I was trying to draw attention to the eyes before anything else, and let the feathers and other colors gradually draw the attention outwards.
The second mask went pretty much the same way. At first I planned to have him standing there completely with arms crossed, but I figured that might get a little off topic (although the expression is about what I imagined).
Instead, I meshsmoothed some simple geometry to give him a quick-made collar that would blend into the background.
After the masks were made and positioned, the next step was the make the background. I opened a new Max scene and made some afterburn clouds, using a prerender with alpha map of the original masks scene to position the clouds.
The sunset and the far clouds are a Max included map, but the closer ones were generated with afterburn. Once they looked good, I rendered and used that image as a background back in the original masks scene.
The final render without the afterburn stats included totaled 600k polys, about 10 megs of custom mapping textures and took 8 minutes to render.
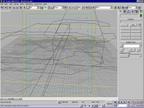
The final image in wireframe and fully rendered is shown below.
 
|
 |
|
|


