Keep 3DLuVr online!
3DLuVr Logo
Sections
Articles
 From the Real World
 Digital Painting Series
 Featuring of...
 On the Bookshelf
Tutorials
 3ds max
 LightWave3D
 Softimage XSI
 Rhinoceros 3D
 Video Tutorials
FunZone menu
 I always wanted to be
 Talk to an employer
 Why Ask "Why"
TechZone menu
 Hardware Reviews
 Software Reviews
 Benchmarking
 Q&A, Tips & Tricks
UserZone menu
 The Artist Sites
 15 Min of Fame
 Request an Account
 Current Assignment
 Sponsors & Prizes
 Make a Submission
 Voting Booth
 Competition Rules
About menu
 Mission Statement
 Policies
 Advertising
 Comments
 Poll Archive
 Links
 How to IRC
 Donations
Login
Log in to be able to post comments to the news items, forum posts, and other facilities.
Username: 
 
Password: 
Not registered? Register!     Lost Password?
Poll
 Your New Year`s Resolution is...
Gain employment
Stop smoking/drinking/etc
Get back in shape
Find the meaning of life
Conquer the World
Absolutely nothing

    Poll Results
Comments
Want to leave us a comment about the site or in general? Click here to access the form.
ArtZone Heading
Quick Poly Modeling of a Rim in 3ds max
Added on: Sun Aug 29 2004
Page: 1 2 3 4 

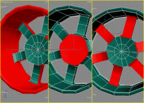
Now make the areas shown in pic13 have different smoothinggroups (the pic to the left have all faces on the front selected also).

pic13


Select the edge shown in pic14 and scale it out alittle to get a rounder edge into the spokes.

pic14


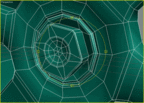
I made the center (as you see in pic15) by extruding, scaling, beveling and rotating, and if you made it this far i dont hink i have to write step by step for this part.

pic15

Now you just need to add a meshsmooth and set it to as many iterations as you need.
And mark Smoothing Groups under seperate by.
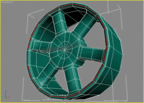
You should now be able to render something like this (without the tire on it). :)

 
� 1997-2024 3DLuVrTM (Three Dee Lover)
Best viewed in 1024x768 or higher,
using any modern CSS compliant browser.