|
|
 |
|
finalRender 101: Basic HDRI and Ray Tracing Added on: Sun Apr 28 2002 |
| Page: 1 2 3 |
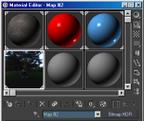
Under the Bitmap Parameters change the RGB Channel Output from RGB to HDR. Below that are the exposure settings. I chose -2 for this tutorial.
 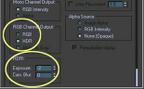
Play around with the setting and see how they affect your scene lighting.
Make sure your object properties are set to recieve and generate GI. In the Material Editor, under the Caustics and Global Illumination rollout, check both recieve and generate. Set their values to 1.0.
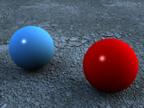
In the Final Render Globals dialogue set a 1/1 prepass size and 300 RH-Rays. Render the scene and you should have something similar to this.
 This first relase of Final Render doesn't allow the use of standard Max raytrace materials, but they really aren't needed. Final Render's raytrace options are so extensive that, for many purposes, you may abandon standard ray tracing altogether. This first relase of Final Render doesn't allow the use of standard Max raytrace materials, but they really aren't needed. Final Render's raytrace options are so extensive that, for many purposes, you may abandon standard ray tracing altogether.
The conversion of Standard Materials is imade easy with the FR Material Converter, accessed through the Utilities panel. Raytrace materials won't show up, so new FR materials will have to be created manually.
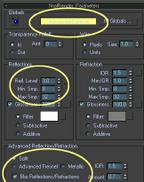
Open the Material Editor and select one of your sphere materials. For both sphere materials set the reflection level to 3.0.
To see how blurred reflections work, open Advanced Controls for one of the materials and check Blurred Reflections/Refractions. Set the amount to .7 and render.
|
 |
|
|


