|
|
 |
|
Realistic head with NURMS Added on: Sun Sep 03 2000 |
| Page: 1 2 3 4 |
Load up 3D Studio MAX.
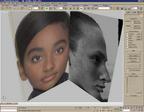
When I create a head, I like to apply my reference photos to two separate flat planes. So, create a patch grid for the front view, and apply the front view image to that patch grid. Turn on the "Show Map in Viewport" button.
Next, create a second patch grid for the side view and apply the side view image to that patch grid. Again, turn on the "Show Map in Viewport" button for that image.
Okay, now you have your reference setup, so lets start modeling!
Modeling the head
I usually start with the lips when making a head. Everyone has their own way, but for me, the lips are what I always seem to start with. Create a patch grid with the lowest step settings set to 1. Move the patch grid overtop of the mouth in the front
view port. Be sure to check "Edged Faces" on your viewports so that you can see the polygons in shaded mode. You can find that under the right-click menu on a viewport name.
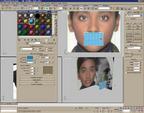
Open up the material editor and apply a shader to the patch grid. Bring the opacity to 0 so that you can see the reference images underneath the geometry. Collapse the stack to an "Editable Mesh" and go into the Vertex Sub-Object mode and delete one half of the mesh.

Delete the two vertices in the middle. This will be the opening for the mouth. One thing you will have to pay attention to though, when you delete vertices, MAX doesn�t always delete all of the faces.
|
 |
|
|


