|
|
 |
|
"Smokin 3" - Advanced 3dsmax Particles Added on: Sat Dec 09 2000 |
| Page: 1 2 3 4 5 6 |
 Now create a wind space warp, place it directly in the middle but a few cm below the ground plane of the spray emitter, make it spherical, give it a strength value of -0.4 and a decay value of 0.034. Now create a wind space warp, place it directly in the middle but a few cm below the ground plane of the spray emitter, make it spherical, give it a strength value of -0.4 and a decay value of 0.034.
You can give it turbulence values of whatever you want, but I'm not using turbulence for this animation...Click on range indication down the bottom if you want to see what the decay value effects.
Assign it to the spray emitter, this will give the smoke a little bit of resistance as it takes off, kind of suttle and unnoticable but that's the way we like it right? Load up the material editor and assign the material you made for chapter 2 to the new particle system.
Now we'll make some changes to the particles material just to give it a better look for this scene.
Go to diffuse level and adjust all the colours to light sand colours.
Go to opacity level and assign particle life and keep the previous mask as a sub mask.
Copy the mask to colour #2 as well and put in 35% under age #2 and change the colour of colour #3 to black.
Now what we have doen is make the particles more of a yellow'ish colour and make them fade to nothing before they die instead of just vanishing without any hint beforehand.
Select the particle system, right click on it and click on properties, down the bottom under image motion blur adjust the value to 1.8.
This will basically soften the particles out a bit which is what we want for this to make the motion a bit smoother, this is a bit cheap at times but it works well for this effect.
Go to the material editor again and select a blank material slot and choose 'get material' and choose new standard material so it creates a blank grey material, assign that to the box and ground plane just to give them a solid colour.
Now it's time to add lights. Essentially create two spot lights, one strong light high in the sky a bit in front of the main area of viewing, and one lower with about .8 multiplier value. And an omni under the plane for a bit of illumination around the sphere and darker areas.
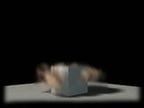
Create a camera and chuck it into your prefered angle of viewing and get cracking rendering. You'll see a nice puff of smoke emit out of thin air and fade away. Schweet.
This is a simple trick which is rather handy for some particle effects, you can do this with super spray just by telling it to stop emitting at a certain frame, but when using spray you do not have this option, nor with particles+.
|
 |
|
|


