|
|
 |
|
"Superhero" Added on: Wed Oct 27 1999 |
| Page: 1 2 3 4 |
Bones and Posing
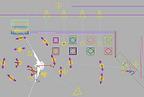
I created the character with the idea of eventually animating him later. So I built him in a neutral pose, and used his low poly body that I sliced in various parts to make his skeleton in Bones Pro. On this picture you can see the simple hand, its bones, and the tessellate relax version.

Even if I used parts of his body to make the bones, you have to keep in mind that only the bounding boxes will be considered by Bones Pro. It's useful because instead of manipulating boxes you really manipulate parts of your character and see quite exactly how it will react.
I made a very simple configuration (just enough for the picture) in Bones Pro and gave the character his final posing by "animating" on one frame his arms and hands, holding the big guns the way I wanted.
Rendering
Textures
The textures for the scene are very simple. The only mapping is the one used for the floor, a rock mapping.
The walls and columns are rendered with a gray gouraud plus a bump noise to catch the light.
Each broom of the broomsticks has a cylindrical gizmo with a tiled black and yellow half checker. In fact all the cartoon elements are gouraud shaded.
Lightning
Since the beginning I wanted two things. To have two light sources, a white one and an orange one, and to have the brooms in front of the camera very dark, just silhouettes.
There are 12 lights in the scene !!!!
The first omni light above the set to lighten up a bit the scene, then there is a strong white omni outside to give the side light on the character. Each window (4) has a spot light, to create the volume light and the shadows on the floor.
An orange omni behind the door in the background to lighten that area. There is also an orange spot there to give a back light on the colums, and another one for Mickey only.
One omni for each gun to simulate the lightning from the firing.
And the last one which comes from the stairs on the left to lighten the wall and Mickey's face.
There are three video post effect in the scene. Volume lights apply to the spots coming from the windows (the first one is stronger), the glow in the background coming from behind the door. For glow, I put a self illuminated orange face behind the set and apply the glow to it.
I used the same technique for the windows, with a white self illum face. Then there is a combustion on two atmospheric apparatus for each gun.
|
 |
|
|


