|
|
 |
|
"Antique Piece" Added on: Thu Jan 14 1999 |
| Page: 1 2 |
When i started thinking about this project, an old toy seemed like it would make an
interesting and challenging scene. I looked around the internet but didn't find anything
that had enough detail to create a scene from, so I asked friends and family if they had
any antique toys. I still didn't come up with much. I did find a replica antique tin toy
in a toy store so I bought it for $4.98.
It helps me alot to have what I am modeling right in front of me with all of its details and texture. The toy I bought was new so I had to make it look old.
I started with the head and body. The head was easy,just a sphere booleaned in half and
squashed then mirrored. For the body I lathed a spline, applied EDIT MESH modifier, tweaked vertices and topped it off with meshsmooth. With the head and body finished I went on to the rest of the model. There really is no great modeling feats here, but I did apply alot of detail to the bear (Picture.1).If you look close you can see I made the little metal tabs that hold the toy together and some of the inner mechanisms that make it work.
Picture.1
Next, was the task of making the texture maps. I wanted it to look old since antiques
are rarely in new condition. I wanted the paint to be chipped with maybe a little corrosion.
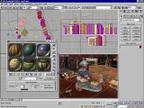
I scanned in what I could of the different parts of the toy and with cut, copy, paste and
rubber stamp in photoshop ,I was able to make usable maps. To get the old look, I sandwiched the map between two layers of a corroded metal texture. I turned the opacity down on top layer of corroded metal to 28% for the old washed out look. I then selected the middle map I scanned from the toy and used the eraser tool from photoshop to erase spots revealing the third layer of corroded metal underneath. This gave it a piant chipped look (Picture.2).
I saved a copy as a TGA for the diffuse map. To make the bump map i selected \"all\" in the middle layer (the chipped paint) then nudged it. I filled the selection with white,
flattened layers and converted it to grayscale. After playing with the contrast a little I had a nice bump map that would make indentations in the paintless areas where the metal shows through.

Picture.2
|
 |
|
|


