So first off, we rename our original mesh to something easy to remember, like, say, Original (as you can see, imagination is not a requirement for this tutorial). Now duplicate it. The quick way to do this, is to just change to the move tool, select your mesh, hold down the shift key and click once. You'll be prompted, and just make sure it's a copy and not an instance, and click OK. Your newly created mesh should default to being named Original01. Let's just keep that. 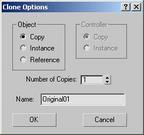
Click on image to view larger Having done that, we now decide on the sizes we want to cut our mesh into, for the purposes of this tutorial there's no sense going nuts with this, so we'll just cut this mesh into two pieces, (there's no real limit to this though, and larger meshes would definitely require some heavier slicing and dicing - just bear in mind that you will need to have at least 2 faces overlapping each other at every seam). So, to start with, we hide our original mesh, and with Original01 (our duplicate), let's select the faces we want to detach. The steps are simple, we first select the mesh selection we want to detach, then we add an extra set of faces around our selection, invert our selection (I strongly advise creating a shortcut key for doing this), and delete those other faces. We should now be left with the faces we want, plus an extra set of faces around the edges. The following gif animation shows the process just described. 
Click to view larger Once we've done this, we could go ahead and hide our extra faces immediately, but I find it easier to leave them there for the moment, as it's handy to see them there while we select our other mesh. It's a point of reference, and it gets very easy to forget just how many faces you should be selecting on your next mesh.
|


