|
|
 |
|
Procedural Shaders: Update on Lava Added on: Sat Dec 14 2002 |
| Page: 1 2 3 4 5 6 |
This looks pretty basic but you get the idea that it�s a rock. Now onto the fun part, lets create some lava! Choose a new empty material to start with. Name it Lava. Now change it�s self illumination colour to 61 and adjust the specular level to 55. We want the self illumination to be up because we want to blow out the colour a bit and let it simulate it�s emitting light, plus later we�ll animate these values so it brightens and darkens over time, And the specular level so light reacts better to it.
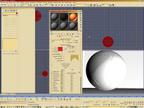
Now go down the diffuse slot and instead of choosing a noise map when you click on the empty diffuse slot, choose a gradient map. Now the material editor should display the gradient properties, so make colour #1 a kind of red orange (Red: 255, Green: 84, Blue 0) and colour #2 nearly the same (Red: 255, Green: 47, Blue: 0). Lastly make the third colour Red: 255, Green: 110 and Blue: 0.
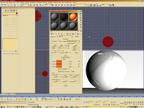
Also to give it a less linear transition between the three colours change the noise value to 0.2 to mess up the pattern a bit, and make the noise size 4.3. Change the noise type to turbulence to get the murky water look we want in the gradient noise pattern. Now go to the last frame of your animation and click on the animate button.
What we�re going to do is animate the colours changing over time to give it a bit of a hot lava kind of look. So click on colour 1 and change the colour values to R: 255 G: 50 B: 0, colour #2 R: 255 G: 58 B: 0 and Colour #3 R:255 G: 56 B: 0. And adjust the phase value under noise to 1.425 so the noise pattern shifts over time.
Now click on the animate button to turn it off!
Click on the go to parent button to go back up to the top of the hierarchy and go down to the bump slot, instead of noise or gradient this time we�re going to choose electric (remember that blur studios electric plugin I mentioned at the beginning of this tutorial?)
First of all click on exponential first to give the stronger colours more better falloffs. Change the width value to 0.44 and the center value to 0.655 and the levels value to 10. Levels basically gives it a bit more cpu calculating power when rendering the electric map, the others just shift the position of the pattern around a bit. Now click on the animate button and go to the last frame and change the value to 0.142 so the electric pattern phases over time. Lastly click on the �go to parent� icon again to go back, and change the bump value to �30 to invert the pattern of the bump.

|
 |
|
|


