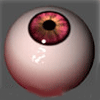
First of all, we have to create a nurbs sphere
and scale it a little (5, 5, 5 it's OK).
|
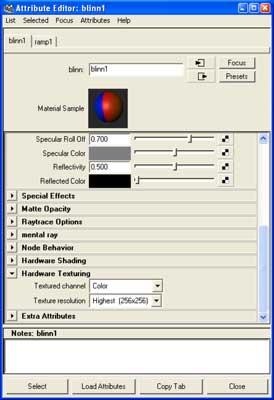
Now we go to the hypershade and create
a new blinn material. Open the attribute
editor and link a ramp to the color of the material.
Then in the material options, put the highest value in the
texture resolution of the Hardware
Texturing.
Now we can see our texture better in the
workspace.
At last, assign this material to the sphere. |
|
 |
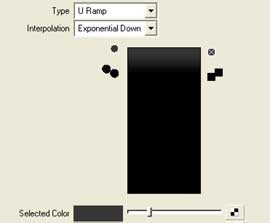
To view correctly the material assigned to the sphere, we
have to change the type parameter in the
ramp node. Change it to U Ramp.
|
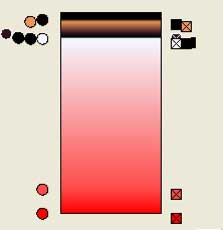
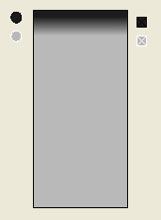
Now, we have to add color layers
in the ramp node. You can take the proportions
like in the picture.
The colors are black, fractal,
fractal, black, black, white, red, red.
I will explain the fractal nodes
later. |
|
|
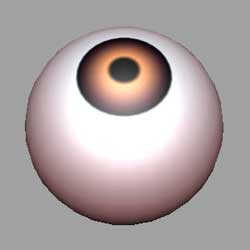
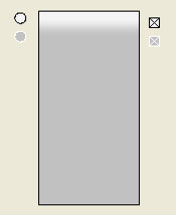
In the workspace you have to view something
like in the next picture. |
|
|
At this time, we will create another ramp
and connect it to the material's bump.
Change the ramp direction like in the
other ramp and add this colors.
Brighter on the iris and darker
on the pupil.
Put the bump Depth at 5.
|
|
|
Now, we will go to make
the fractals that we have to put in the
first ramp created (remember the second
picture). Make two fractal nodes and map
them to the colors of the ramp.
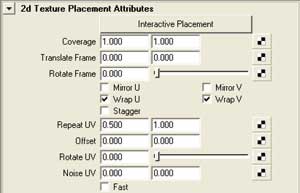
|
In both, make the changes in the place2dtexture
that you can see in the next picture. |
|
|
In the first fractal's (the nearest to the pupil) change
the color balance to the colors that
you like.
Change the frequency ratio to 4.0 (for
more soft look) and bias to 0.2 (more
contrast).
|
|
 |
In the second fractal put another colors
(brighter than the others) and the same values on frequency
ratio and bias. |
|

|
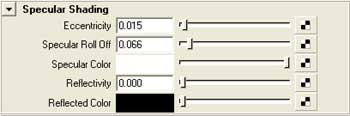
At last in this blinn shader, assign the values
that you can see in the picture.
This values will generate the eye's bright.
|
|
|
The workspace have to show
something like this.
|
Now we have to create another material for a more accurate
bright.
This time, will be a phong material.
Assign a ramp node to the bump.
Like you can see in the picture, the ramp is brighter
in the pupil.
Change the values like in the image.
|
|
|
In this ramp, change the color
offset to black and color
gain to almos black. These values,
will recreate the bright of the eye.
If you don't like it when you make the render, change
them.
|
At las in this material , we have to connect
another ramp to the transparency.
The ramp have to be like in the next
image. White in the pupil and grey
on the rest of the eye.
Remember to change the ramp's direction.
|
|
|
| To finish the texture, create
a layered shader and assign it the two
materials that you have created (first
the phong and second the blinn material).
Assign the layered shader to the sphere
and make a render.
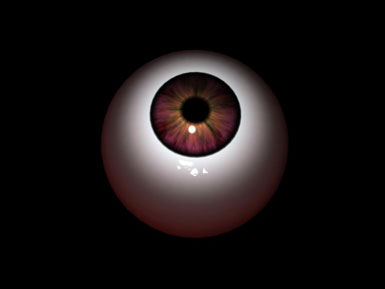
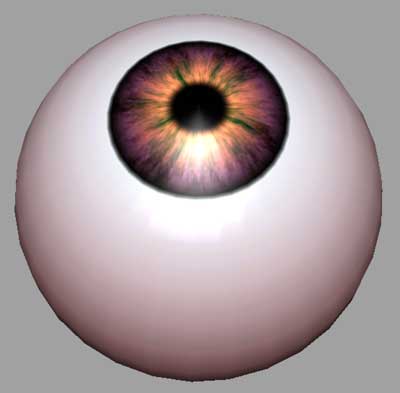
This is the result after this tutorial.
If you want the scene click here. |
| |