|
|
 |
|
Low Poly Modeling for Real Time Added on: Mon Oct 16 2000 |
| Page: 1 2 3 4 5 6 7 8 |
Go to edge level and near cut there is the slice plane button, click on it, a yellow gizmo will become visible, now rotate it and position it to fit directly through the shin, click on slice.
A new segment apears, what we need to do now is go to vertex level and weld the vertices that remain, since there are edges that were divided that we do not need to devide such as the invisible edges, so lets weld them onto the ones we wish to use.
 
Select those new vertices and move them in the left viewpoint inward just a bit. Now we want to create the other side of the leg, the way we shall do this is by selecting the edges of the leg, just around the calf area, and cloning them out behind the leg, and then doing it again, move the edges in now and position them correctly, build the face at the back up to fill the gap between the two edges.
Extrude the back edges upward to create the rest of the leg and then weld those vertices to the leg. This should create two vertices on each side that need to be welded, rather than target welding, what we'll do is select the two vertices on one side, under the numerical type in box next to selected (just above target weld) type in 5000 and then click on selected.
This welds the two vertices together directly in the middle of their position. do it again for the other side. Select the other two vertices, click selected. They're welded, well done.
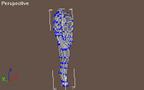
Now extrude up the leg one more segment so we get up to the top of the leg. Now Keep in mind we have nine vertices for the leg segment, so we want to create nine for the leg socket for it to plug into. Around the leg's bikini line, build those nine vertices around the socket. From here build the faces together and continue to extrude faces around to create the backside. So far your character should look something like below:
We are going to model the feet of the model next so zoom in the left viewport. Create a box and go to vertex level, select all the vertices and delete them, begin to plot vertices around the side profile of the foot in areas that are required so that the foot would bend properly. It should look something like below. Build the faces around the foot.
 
|
 |
|
|


