|
|
 |
|
"Superhero" Added on: Wed Oct 27 1999 |
| Page: 1 2 3 4 |
Photoshop
After the rendering was completed (10/15 minutes), I modifed my picture in Adobe Photoshop
to improve it and give it more details and some effects I couldn't get in Max.
I did all the changes on layers so I could get back at any time and take off some elements. I discarded away, for example the munitions and the smoke from the cigar that I had added.
The first thing I did was to put the chains I had rendered separately in front of the camera. I rendered them apart so I could be able to blur, move and scale them as I wanted, to make the picture deeper. I also blured the first and bigger broom in front of the camera for the same reason.
Then I had a lens flare on the window to make the chains more visible, and the light stronger. A tip for lensflare on Photoshop: As you can't do a lensflare on an invisible layer in photoshop, this is what I do generally: I create the lens flare on a black layer in screen mode. It allows me to change its color, to put it between two layers, to move it or to delete it. Even at the end if I want. That's what I did for example for the lens flare which is supposed to be a small explosion on the broken broom.
As the combustion for the guns were not enough, I drew a yellow laser fire. A line duplicated on various layers lighter and thinner each time. (which gave a Star Wars saber look) It was almost the same technique used for the laser coming out of the glowing "M" on his chest.
I then added a small glow all over the image by copying the whole picture, pasting it and blurring it in another layer in lighten mode, which makes all the light areas glow more or less depending of the blur.
The last thing I did was to put some 2D details like the stars on the hat that were missing. The cigar that is not very visible as I took off the smoke. And of course the detail I'm very proud of, the hole in the ear. I made it very simply by copying and pasting, with a circle selection, a piece of the picture just above. Then I had some blood... brrrrrr... If Walt could see that, I'm not sure he would appreciate...sorry sorry sorry...
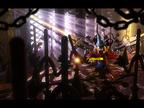
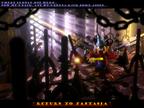
I finished the picture by applying a sharpen filter and giving it a movie looks with its 16/9 aspect.
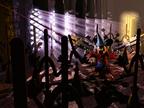
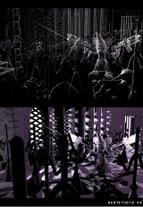
The final image in wireframe and fully rendered is shown below.
|
 |
|
|


