|
|
 |
|
"Superhero" Added on: Wed Oct 27 1999 |
| Page: 1 2 3 4 |
The Character
The technique used for the character is polygon modeling. Mickey is made with just enough polygons to have all the details I need, then at rendering time I applied "Tessellate" and "Relax" to give it a smooth look. And it allows for a light model in Max for adding bones or morphing...
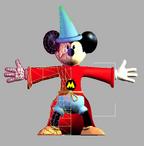
I started the head with a very low sphere, then I created the details by deleting, creating, extruding, collapsing faces, edges and vertices. I put enough definition on the eyebrows and the mouth to allow me to make facial expressions.
The nose and ears are made with spheres. The hat with a torus and cone. For the eyes, I created a smaller sphere with the same pivot as the head, so I could turn it inside to make him look around, then deleted all the unused faces.
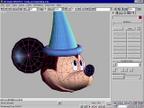
When you make a low polygon model and then apply a meshsmooth or a tessellate, one of the problems you encounter is the loss of volume as the model gets smoother and thinner.
One technique to keep volume where you want, is to double the edges of the zone you want sharper, to prevent the vertices from moving. That's the case all around the pink part of the face, around the eyes, on the wrinkles of the shoes...
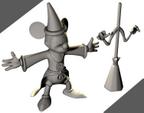
I wanted to make the broomsticks very simple and light as I wanted to multiply them around Mickey. For the body I used a long capsule, and then made a loft with some scaling for the arms... Then I took the Mickey's hand and made a unique posing, collapsed it and applied a big optimize. The lower part of the broom is a low polygon model with a tessellate relax enabled at rendering.
|
 |
|
|


