proportions I took photographs of a friend and mapped the results
onto two planes. Special thanks to Rob Yorke.
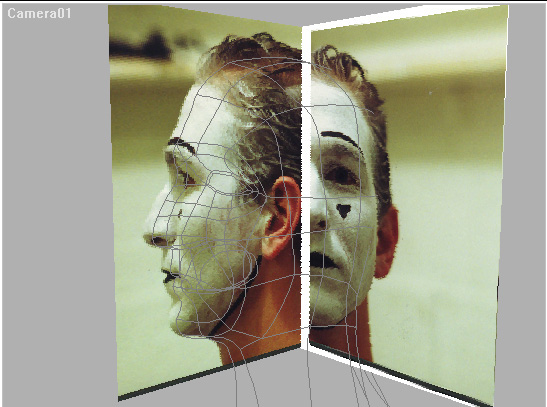
I started
the modeling process with the head. To get the correct
proportions I took photographs
of a friend and mapped the results
onto two planes. Special thanks
to Rob Yorke.
A spline cage
was made from the pictures by first tracing the profile
and front view, then simply adjusting
the splines until they looked right.
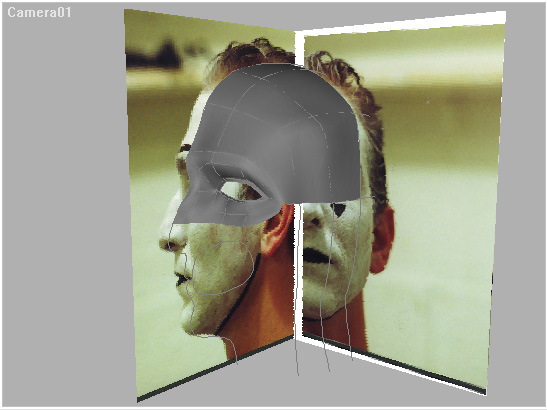
The advantage of this type of patch
surfacing to NURBS was that I could
create more detail in a place like
the mouth and eyes, but keep the detail
low at the top of the head. The
output of this spline cage is polygons.

After a surface modifier is connected
the surface appears. Two vertices
must be locked together to create
one edge of a polygon.
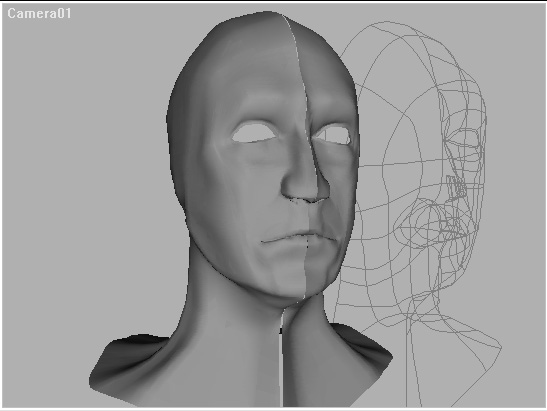
When the spline cage was finished
it was mirrored to the other side. Later on
I fixed problems with the model
and welded the two parts together to create
one seamless mesh.
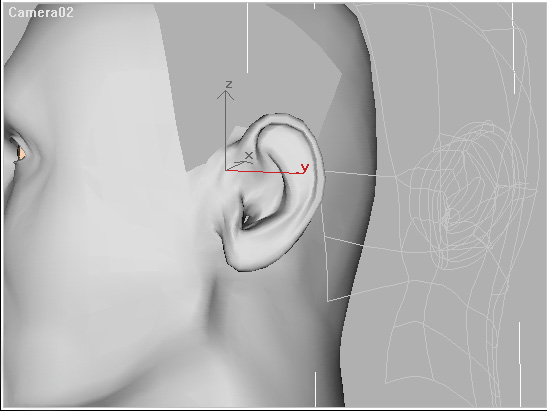
The ear was difficult
at first to create. I started with a circular
spline and duplicated it a few
times. I changed the sizes of the splines
to match an ear then connected
them together. After that it was just
a matter of moving points in order
to acheive a realistic look.

When the ear was finished I imported
it into the scene with the
mime's head. The two spline cages
were connected then the
individual points were connected.
When connected correctly
the surface would smoothly appear
between the ear and head.
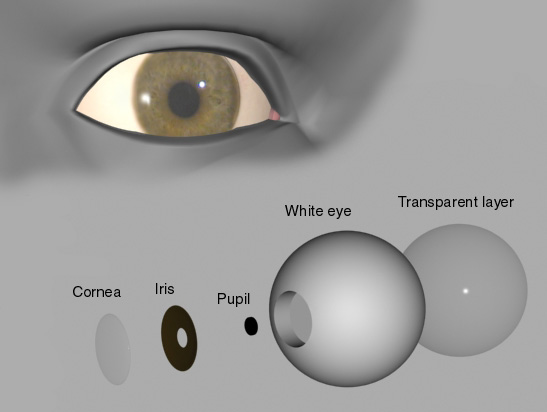
The eye was created
by making five different parts as seen below.
When a light is placed above the
character the iris will respond correctly
to the light by being brighter
in the lower half. The reason for this is
because I want to have a few very
close shots of the mime's face in the
animation. Also whenever people
watch
a person on screen they always
watch the eyes for emotion and
intelligence.